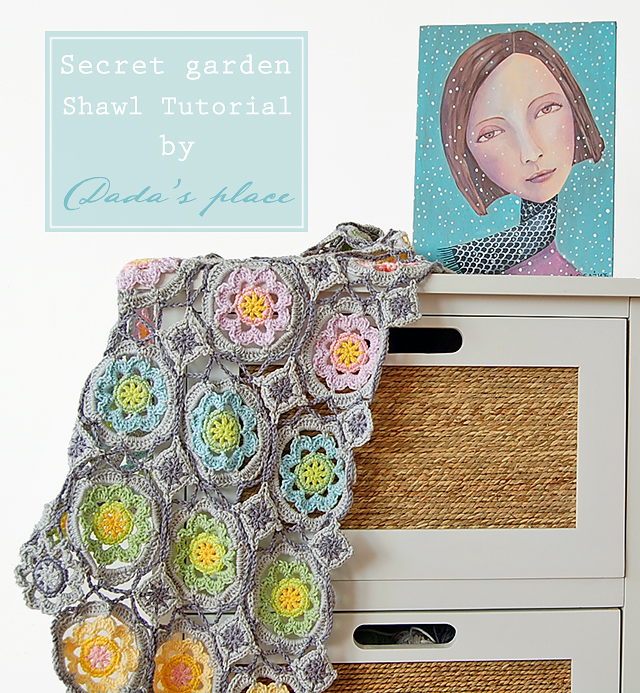
And now it’s time for the last part of our Secret Garden Shawl tutorial. First, a few words about the yarn. For this shawl (as for majority of my projects) I used “Tango” yarn. It’s 100% cotton yarn 125m/50g. The manufacturer is St. George from Serbia.
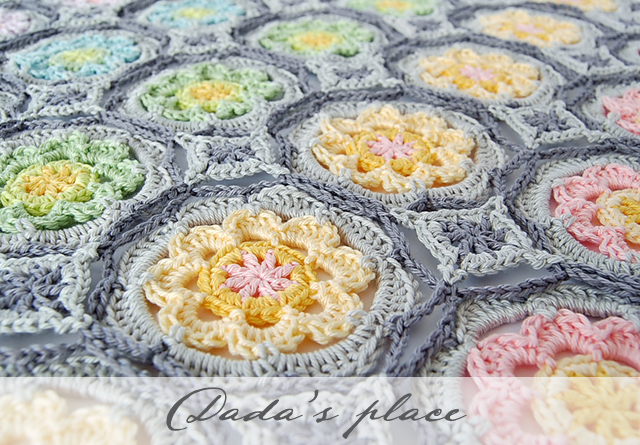
I used these colors:
1. light yellow 0303
2. yellow 0004
3. lime green 0113
4. light green 0350
5. light blue 0404
6. light pink 0394
7. light lavender 0408.
8. light grey 0025
9. grey 0370
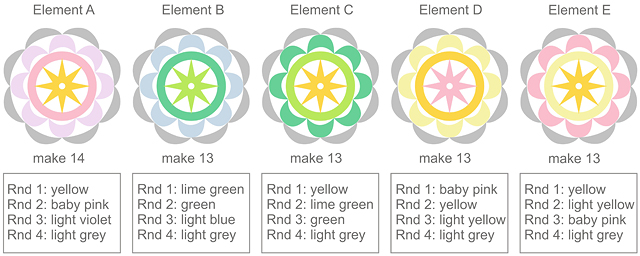
These are the Secret Garden Flower elements. There are 5 different elements. You need to make 66 elements in total, 14 pieces of element A, and 13 pieces of all the other elements.
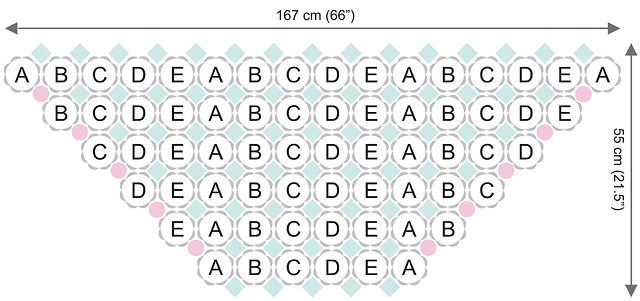
This is the chart of the whole shawl. You can see that you need to make 65 small square elements (little blue squares in the picture), and 10 small flowers (pink circles), five on each side of the shawl. Now you think: “It sounds like a lot of work!” Yes, it is, but I think the shawl is worth the effort.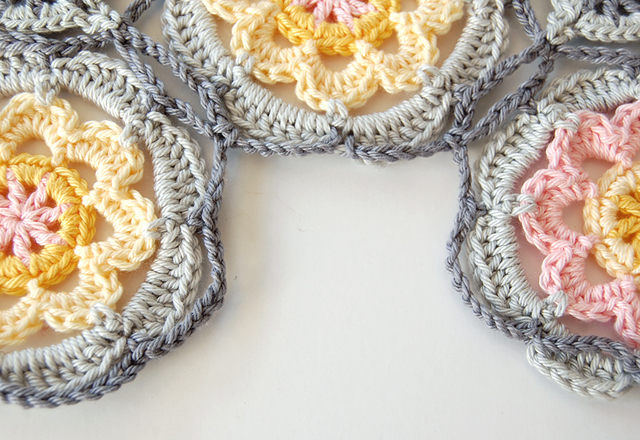
The last lesson you have to learn is how to make and join the small flowers on the sides of the shawl. So, let’s get started!This is the place where we will join our small flower.
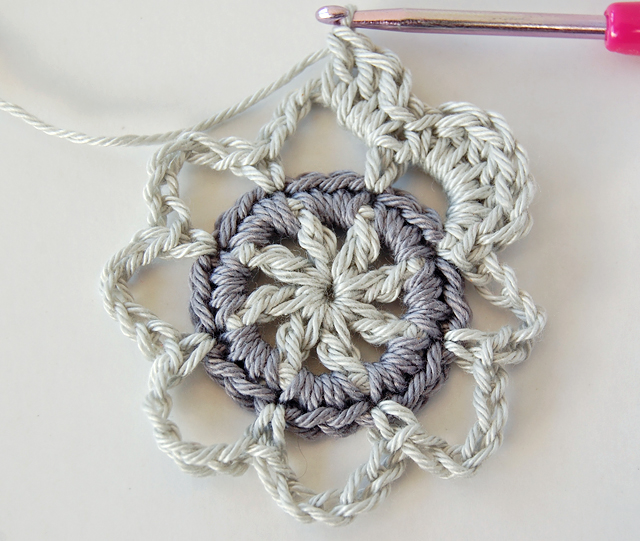
Complete the first three rounds of the Secret Garden flower. Work through the fourth row, make one complete petal, and stop once you’ve worked the third dc of the second petal.
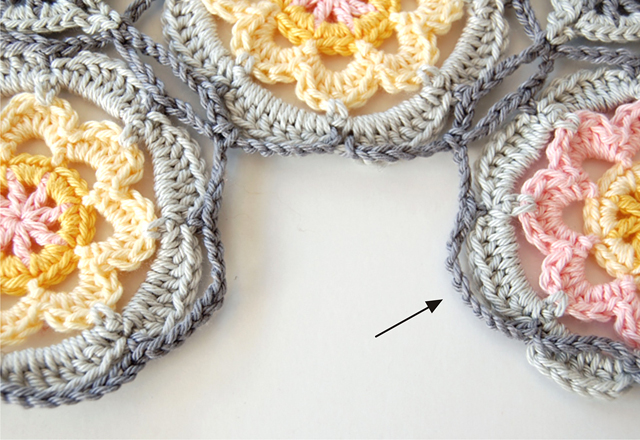
The arrow in the picture indicates the place where you should join the first petal.
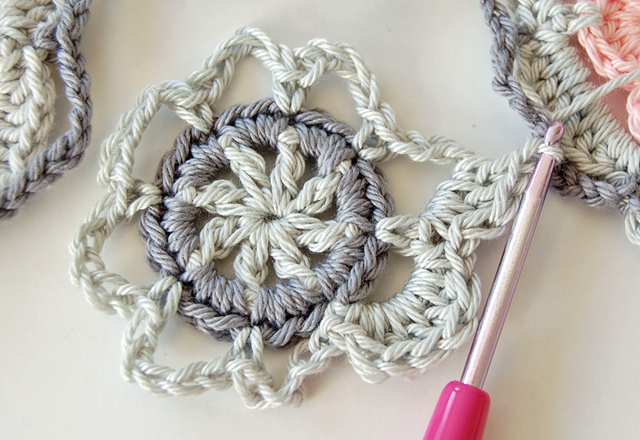
So, just make slip stitch in that ch-9 space
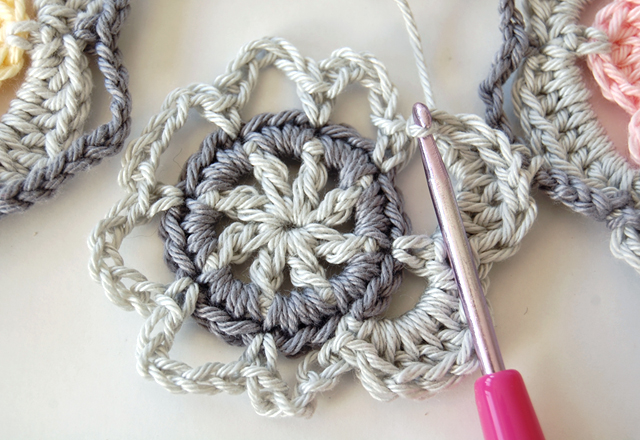
then make 2 dc and sc in the same ch-5 space (these are remaining stitches of the petal)
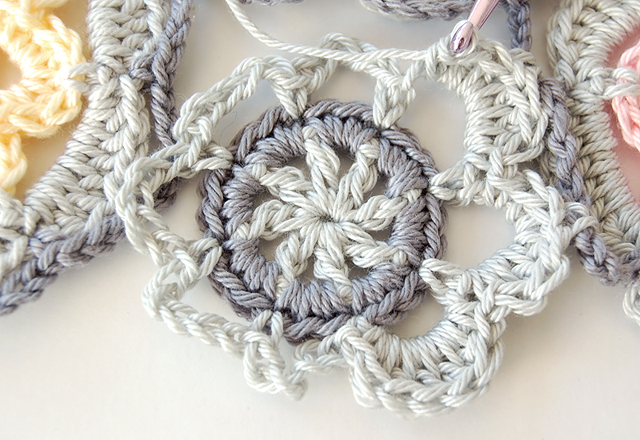
Make sc, then 3 dc in the next ch-5 space, and then again, join the petal to the next ch-9 space with slip stitch. Make the rest of the petal – 2 dc, sc in the same ch-5 space.
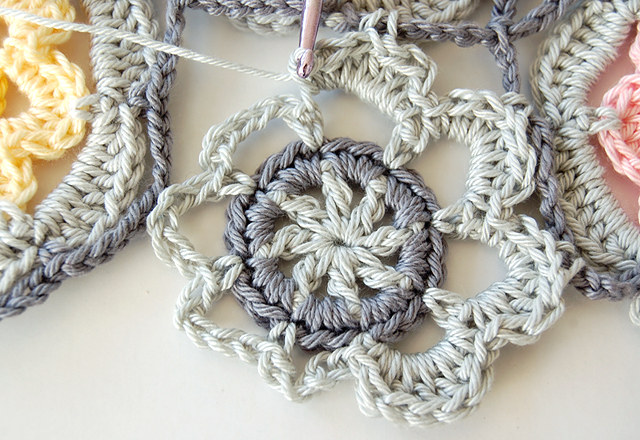 Now, join the third petal to the next ch-9 space in the same way you’ve already joined the two previous petals.
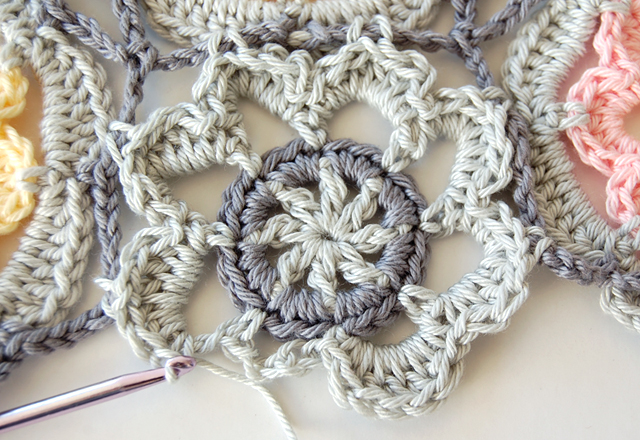
Join the fourth, the fifth and the sixth petal to the next 3 ch-9 spaces. Now we just have to make one more petal.
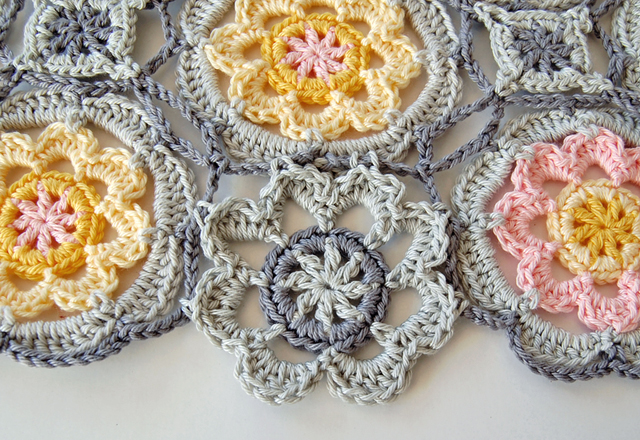
So, make the last petal (sc, 5 dc, sc in the last ch-5 space), and join with slip stitch to the first sc, or make an invisible join. Fasten off. Join 9 remaining flowers in the same way. Now, when you’re done, you can enjoy your shawl and be proud of yourself!
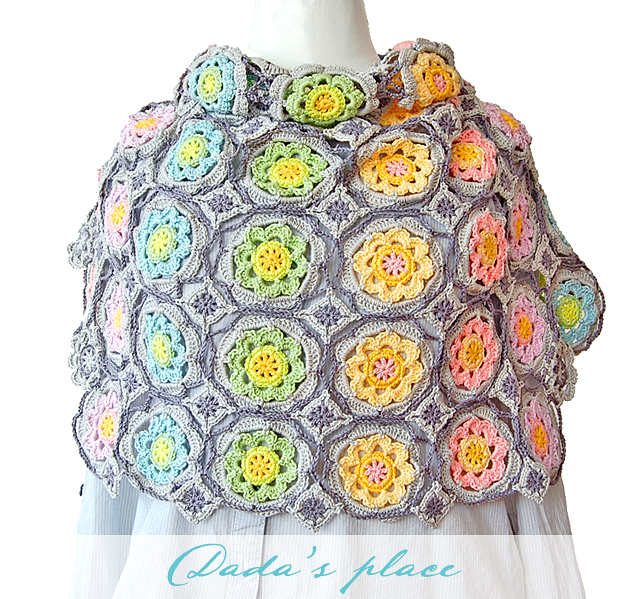
Hope you will like this tutorial! If you do, and decide to make one for yourself, please send me a picture, I would be delighted to see it!
The first part of the Secret Garden Shawl tutorial you can find here. The second part is available here.
Have a creative week!

The last lesson you have to learn is how to make and join the small flowers on the sides of the shawl. So, let’s get started!This is the place where we will join our small flower.

Complete the first three rounds of the Secret Garden flower. Work through the fourth row, make one complete petal, and stop once you’ve worked the third dc of the second petal.

The arrow in the picture indicates the place where you should join the first petal.

So, just make slip stitch in that ch-9 space

then make 2 dc and sc in the same ch-5 space (these are remaining stitches of the petal)

Make sc, then 3 dc in the next ch-5 space, and then again, join the petal to the next ch-9 space with slip stitch. Make the rest of the petal – 2 dc, sc in the same ch-5 space.
 Now, join the third petal to the next ch-9 space in the same way you’ve already joined the two previous petals.
Join the fourth, the fifth and the sixth petal to the next 3 ch-9 spaces. Now we just have to make one more petal.

So, make the last petal (sc, 5 dc, sc in the last ch-5 space), and join with slip stitch to the first sc, or make an invisible join. Fasten off. Join 9 remaining flowers in the same way. Now, when you’re done, you can enjoy your shawl and be proud of yourself!

Hope you will like this tutorial! If you do, and decide to make one for yourself, please send me a picture, I would be delighted to see it!
The first part of the Secret Garden Shawl tutorial you can find here. The second part is available here.
Have a creative week!
So stunning, thanks for sharing
Clare x
Thank you Clare! 🙂
Beautiful! Thank you so much for the fabulous tutorials. ♡
This is really beautiful. Thanks for the tutorial.
A favorite to be sure; thanks for sharing!!
Its beautiful 🙂 Thank you for sharing!!!
This is just beautiful and I am going to attempt to make. You didn't indicate how many balls of each color you used.
Muito lindo mesmo, obrigada por partilhar os seus trabalhos.
Ja tenho em mente fazer um projeto com estas rosetas.
Beijinho
Thank you Cindy! Unfortunately I don't know how much yarn I spent. I made this shawl more than a year ago and I wrote down how much yarn I spent, but then when I was doing some spring cleaning I probably threw that notebook away… I can't find it anywhere! 🙁