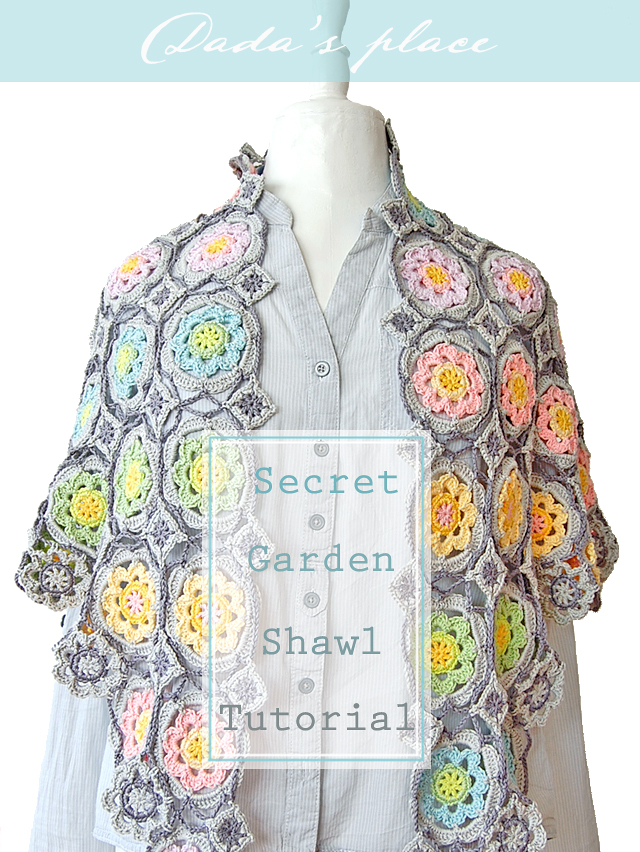
I’m always very happy and excited when I have something to give, and today I’m sharing with you the second part of my Secret Garden Shawl tutorial! So, I’m happy! Very happy! Hope you will be happy too! In the first part of the Secret Garden Shawl tutorial, I showed you how to make Secret garden flower. Now, it’s time to learn how to join our flowers. We will use “join as you go” method. In this tutorial I use U.S. crochet terms.
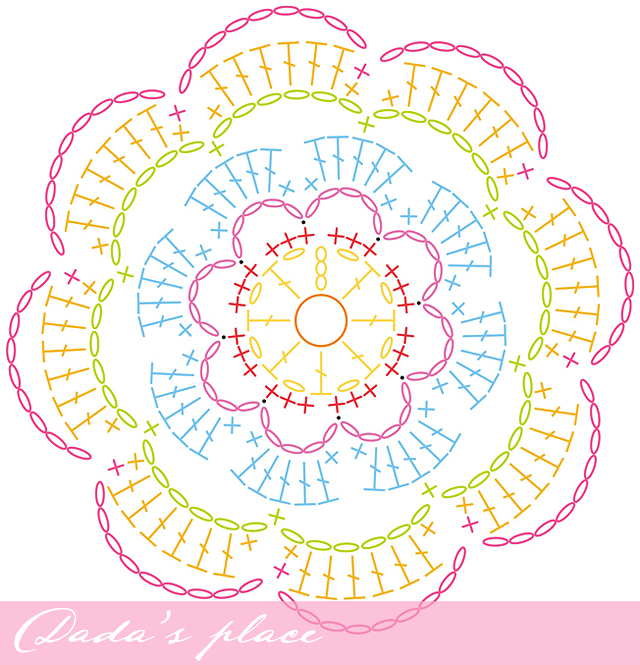
I know that many of you, prefer crochet charts instead of written tutorial (me included), so I made one colorful chart for you. I like to make every round in different color, because it’s easier to differentiate one round from another, which is sometimes very helpful. This is, of course the crochet chart for Secret Garden Flower.
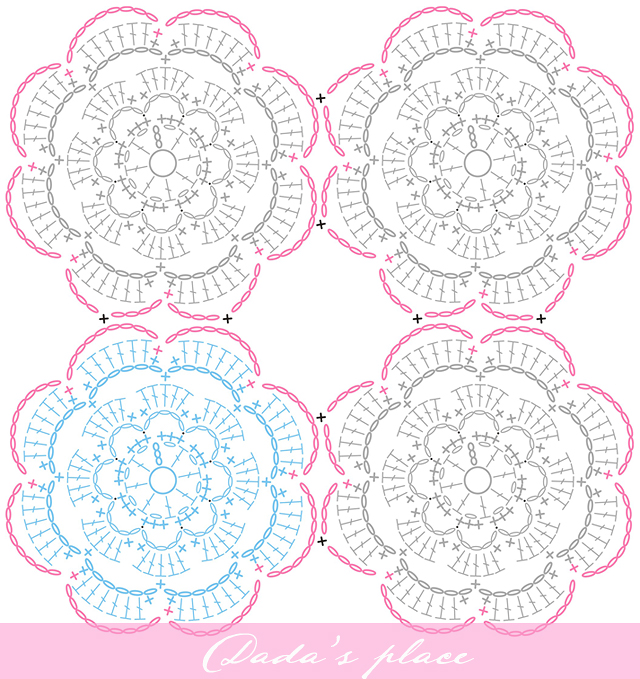
And this is the chart for joining the flowers. We have to make only one complete square (the blue one on the picture), with others, we need to complete only the first six rounds, the last round we will make and in the same time join our flowers. So, let’s start!
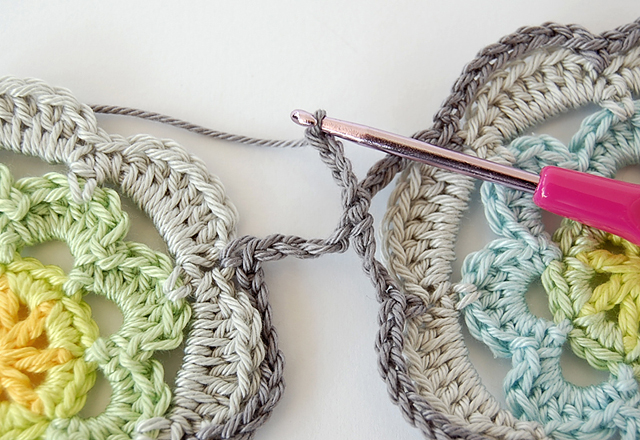
Make one complete flower, and complete the first six rows of the next flower. After you make several ch-9 petals of the last (seventh) round, make ch-4, take the first completed flower and insert your hook into any of ch-9 spaces; make slip stitch, then ch-4.
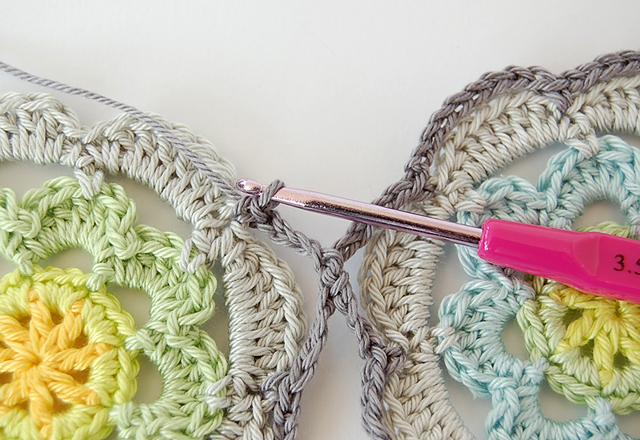
Make sc in the first stitch of the next petal, which is sc.
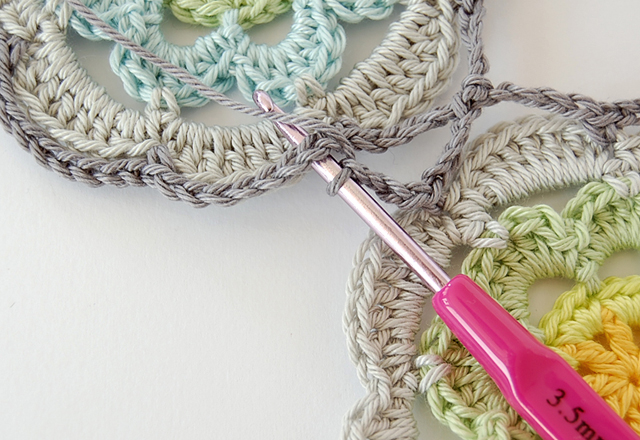
Make ch-4, then again, insert your hook into the next ch-9 space of the first flower, yo,
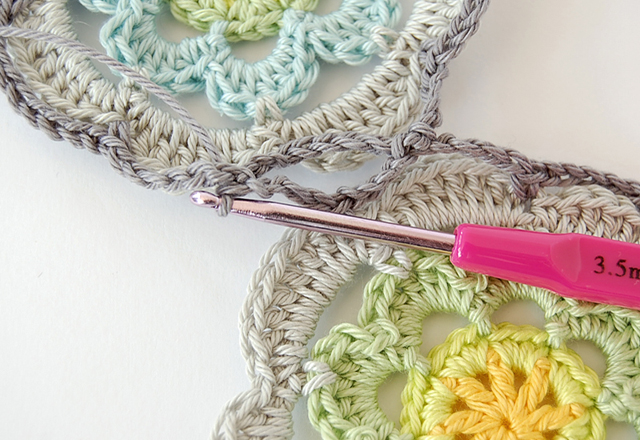
and make slip stitch.
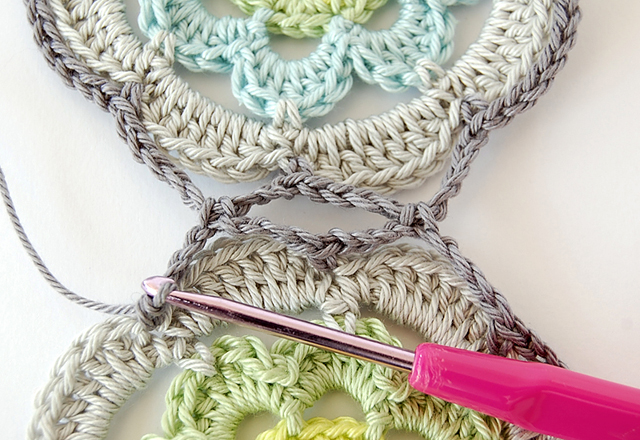
Make sc in the first sc of the next petal. We’ve just joined the first two flowers. Continue the last round of the second flower as you normally would.
When you finish the second flower, join the third flower in the same way we joined the first and the second flower together. Then join the forth flower with second and third. Look at the chart to see where to make joints.
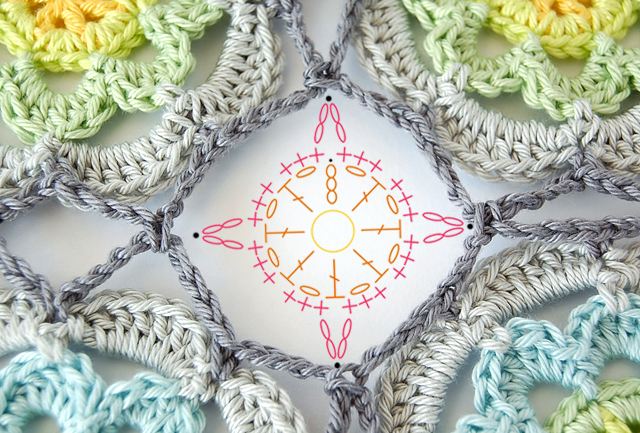
In this space between 4 joined flowers we will make our small square element. We will join it together with the flowers also with slip stitch.
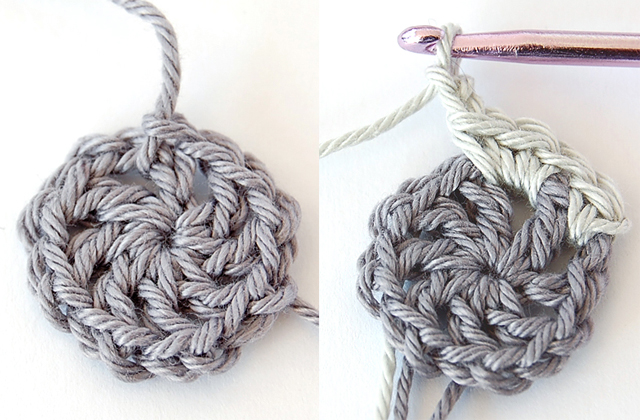
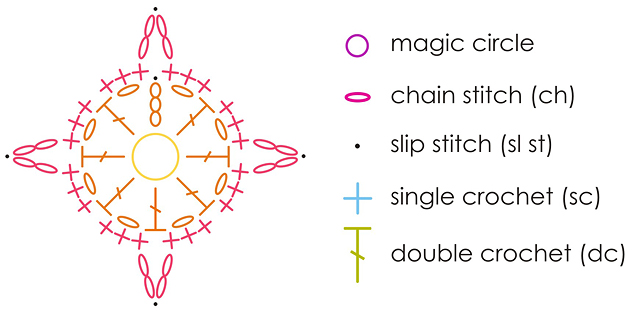
First, make a circle in the same way you made the first round of the Secret Garden Flower. Begin with a magic ring. Make ch-4 in the ring. (Counts as dc and ch-1) Make * dc in the ring, then ch-1; Repeat from * 6 more times. You should have 8 dc with ch-1 between each dc; Pull the yarn tail and close the ring. Join with slip stitch to the first ch-1 space.
Insert a new color (light gray) in any of the ch-1 spaces, make ch-1, then make sc in the same space. Make 3 sc in the next ch-1 space, then make ch-2.
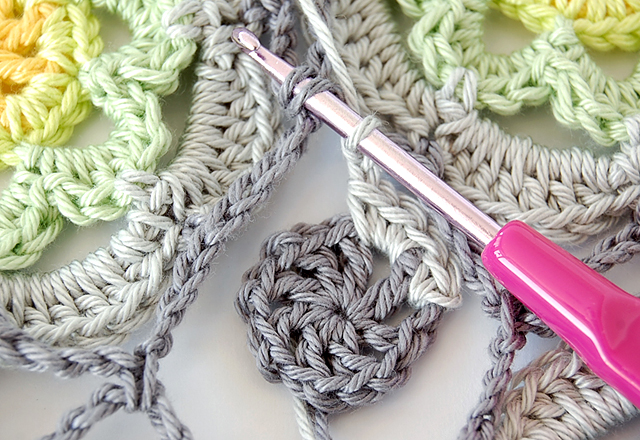
Insert your hook into the joint of two flowers, through both loops
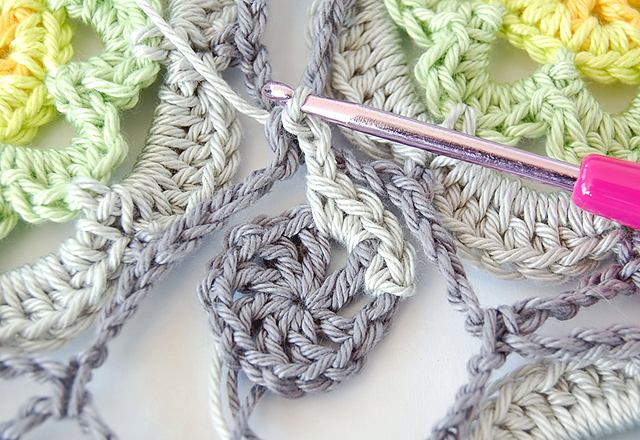
yo, and pull the yarn through the stitch and through the loop on your hook, which means to make slip stitch.
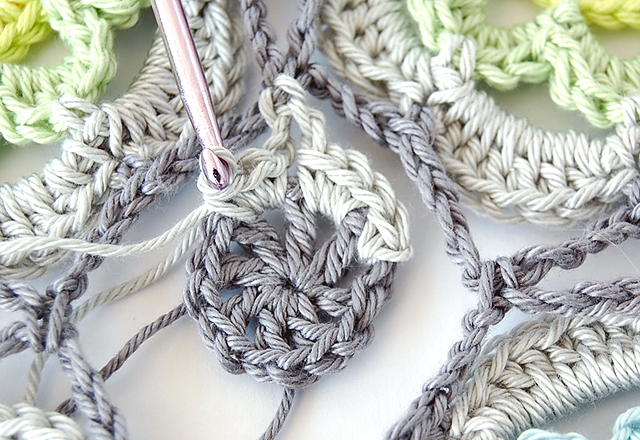
Make ch-2, then 3 sc into the next ch-1 space.
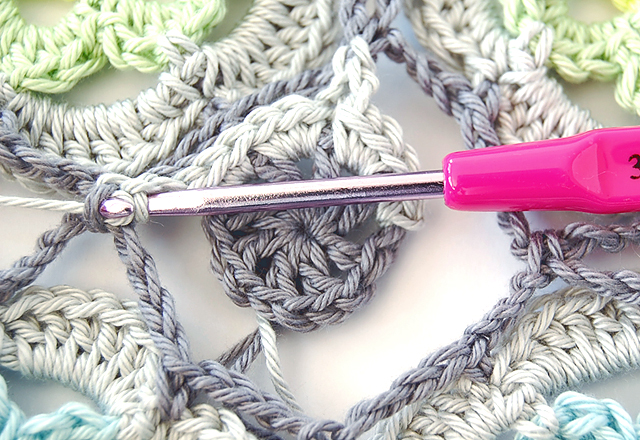
Make 3 sc in the next ch-1 space, ch-2, then again, insert your hook into the next join of two flowers (through both loops), yo and pull the yarn through the stitch and through the loop on your hook. (make slip stitch)
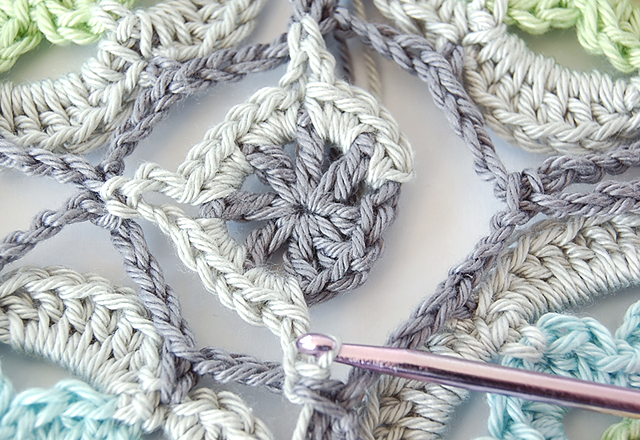
Make * ch-2, 3 sc in the next 2 ch-1 spaces, ch-2 and make slip stitch into the next joint of two flowers.
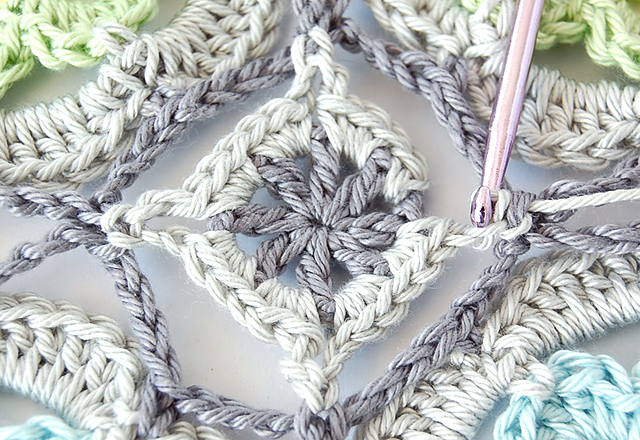
Repeat from * one more time.
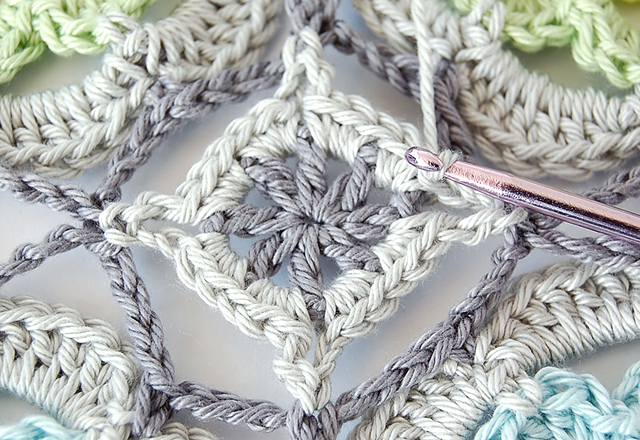
Make ch-2, then sc in the first ch-1 space where we’ve already made our first sc. Cut the yarn and pull it through the stitch. We’re going to make an invisible join.
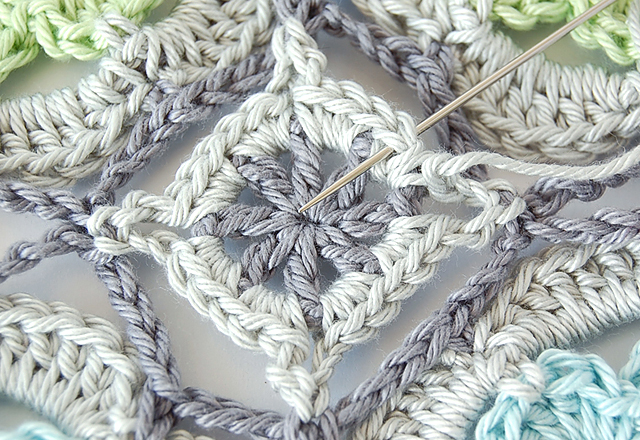
Thread the tapestry needle, and insert the needle below both loops of the first sc we made, from back to front, and pull it through.
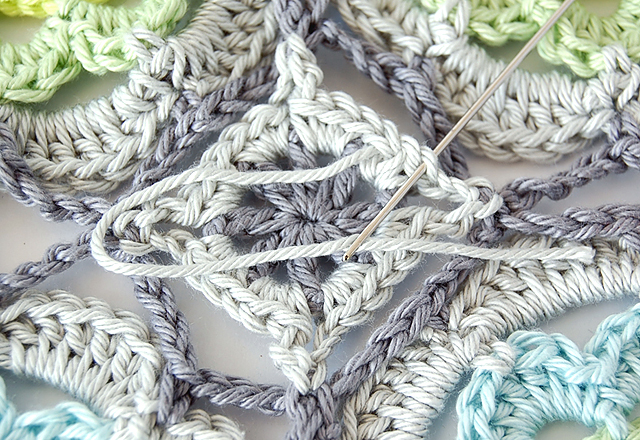
Insert your needle back, into the last sc you made – through the back loop only, from front to back, and pull it through.Weave in yarn end.
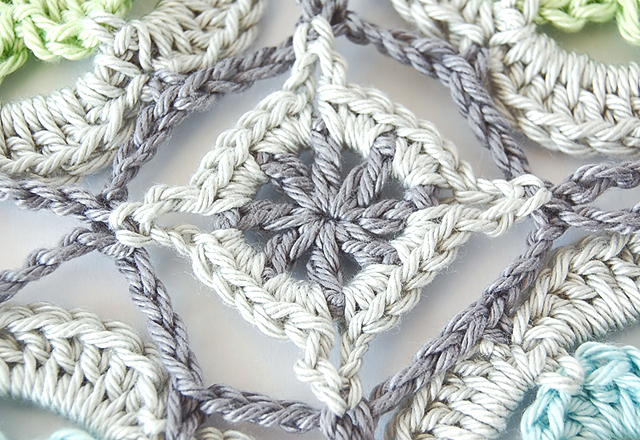
And this is how our small square element should look like. It was easy. Isn’t it?
Next time, in the third part of the Secret Garden Shawl, I will show you how to make and join those little flowers on the edge of the shawl. I will also make color chart for the elements of the shawl as well as the element placement chart.
The first part of the Secret Garden Shawl tutorial you can find here.
Click here to see the third part of the Secret Garden Shawl Tutorial
so beautiful and the charts are such a help for me. What program do you use to create the charts?
Thank you Tanya! I use CorelDraw to create the charts. It's a drawing program, it isn't a crochet chart software.
I love shawls and caplets and this one is so lovely! Thank you for creating this tutorial, diagrams and writhen pattern and sharing it all. It is on my "To-Do" list!!!! Darlene P.
You're welcome Darlene! I'm glad to share this tutorial with my readers! 🙂
Muchas gracias por compartir este trabajo tan hermoso !!!
Realmente sin desperdicio… =)
This shawl is so beautiful and your tutorial is outstanding. Thank you for taking the time to show each step in such detail. I would love to know what yarn you used for this project.
Thank you! I used 100% cotton yarn "Tango" from St. George (manufacturer from Serbia) 125m/50g
Thank you for making this awesome tutorial for us. Your invisible join method is perfect!
Thanks for sharing this!
Bravo c'est magnifique et ton tuto est très clair ,merci pour ces belles couleurs et ton travail je m'abonne à ton blog il est genial
Thank you so much for the wonderful secret Garden Shawl
Thank you so much for sharing, just love this. Will definitely make as a poncho, great for travelling. You are very talented.