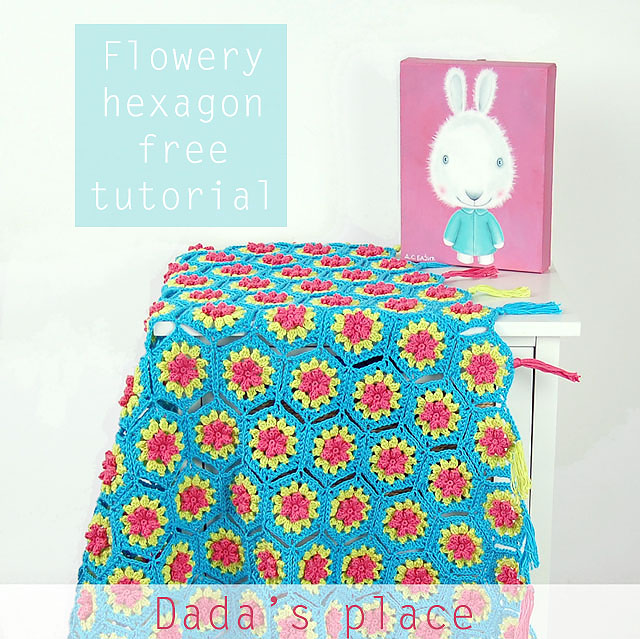
As I promised in my last post, I prepared for you the free pattern and step by step tutorial for this flowery hexagon. It’s very simple crochet project and so easy to make. I think that this pattern would be a perfect project for an advanced beginner who has mastered the basic stitches. For this hexagon I used 100% cotton yarn 125m/50gr called “Tango” by St. George, and 3.5 mm crochet hook.
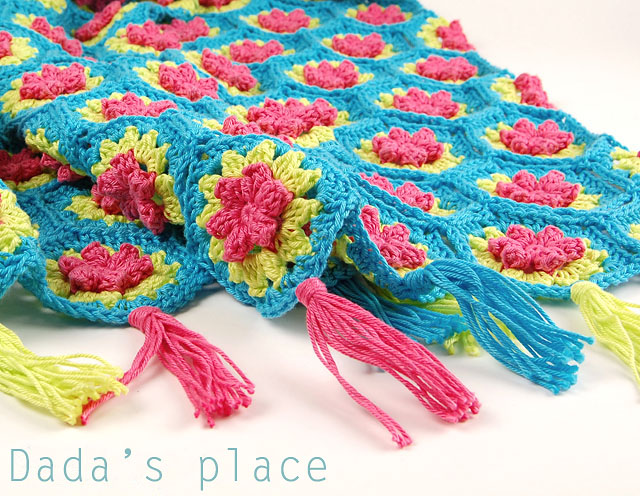
The tutorial is written using U.S. crochet terms.
Stitches we will use:
Stitches we will use:
Magic ring
Single crochet – sc
Double crochet – dc
Slip stitch – sl st
Chain stitch – ch
Special stitches:
Special stitches:
Popcorn stitch
Cluster (dc3tog)-double crochet three together
So, let’s get started!
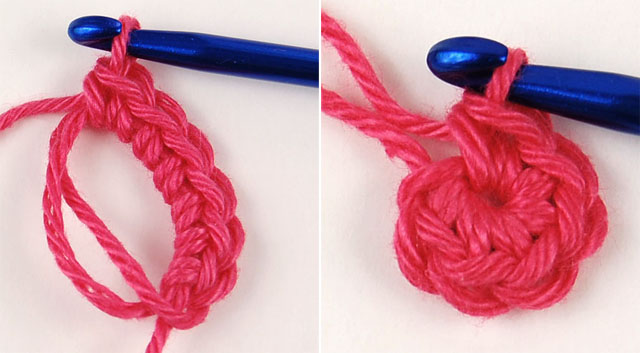
We’ll start with a magic ring. Make 6 sc in the ring.
Pull the yarn tail and close the ring.
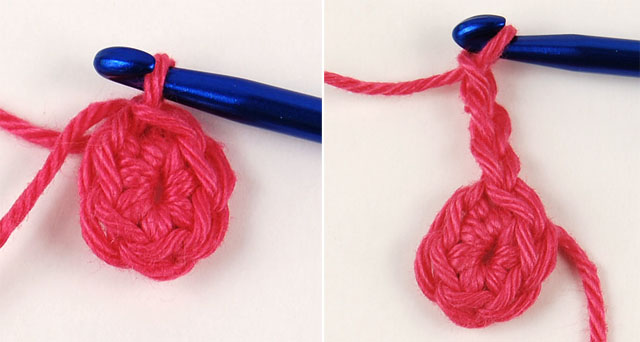
Join with slip stitch to the first sc.
Now, we’re going to make a Popcorn stitch, so make ch-3 (counts as dc)
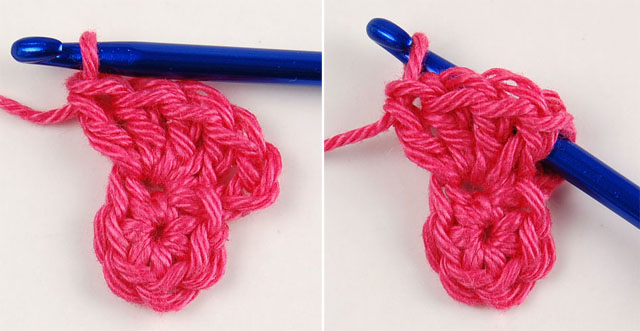
Make 4 dc in the same space.
Now, drop the loop from your hook. Insert your hook from front to back into the space between the initial ch-3 and the first dc, then grab the dropped loop with the hook,
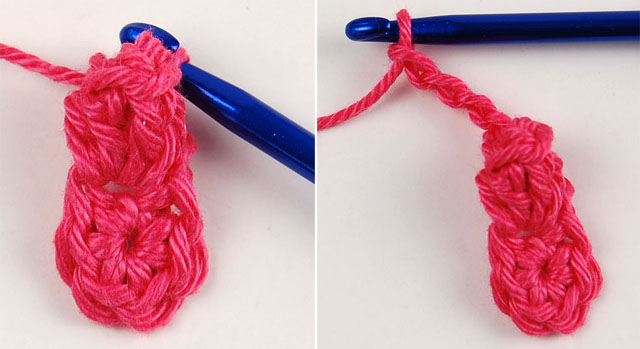
and pull it through the stitch. We’ve just made our first Popcorn stitch!
Now, make ch-4;
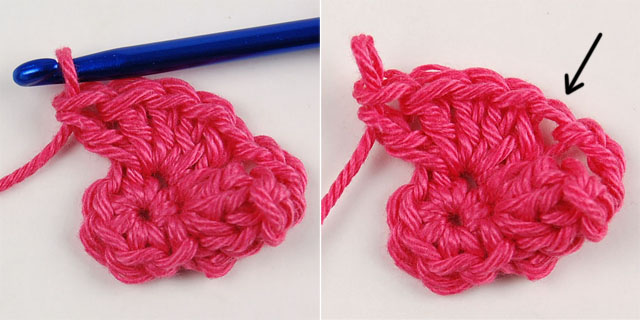
Make 5 dc in the next sc.
Drop the loop from your hook. Now, look at the picture to see where you should insert your hook. It’s the first dc of the group of 5 dc.
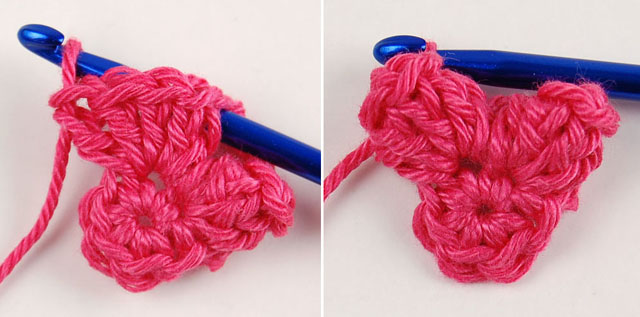
Insert your hook from front to back through the first dc, grab the dropped loop,
and pull it through the stitch.
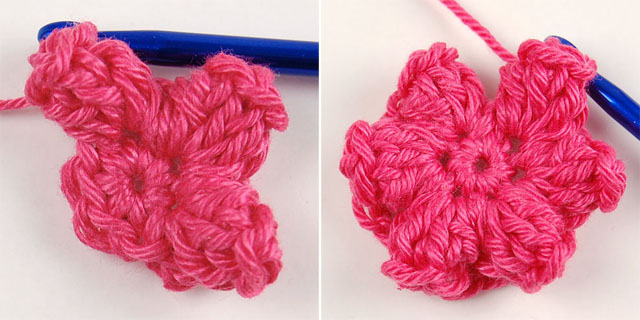
* Make ch-4, then Popcorn in the next sc.
Repeat from * three more times;
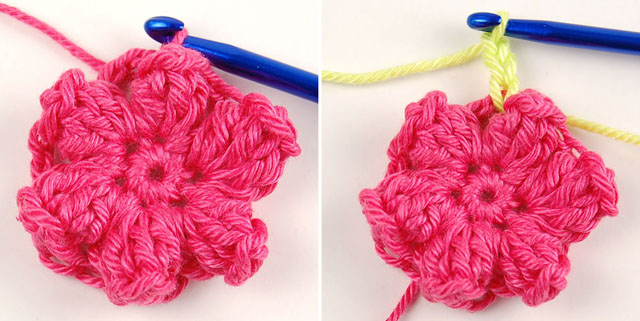
Make ch-4 and join with slip st to the top of the beginning Popcorn. Fasten off.
Now, we’re going to make a Cluster stitch – dc3tog (double crochet three together), so insert a new color in any ch-4 space, and make ch-3 (counts as dc);
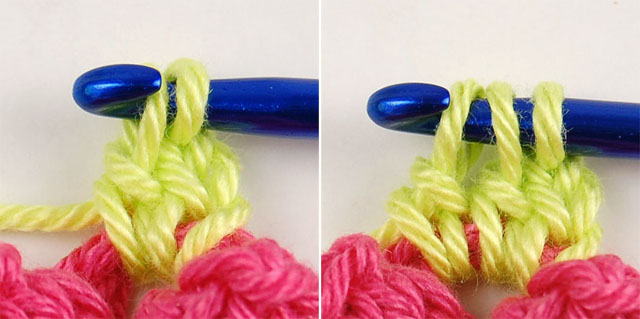
Make an “incomplete” dc – yarn over, insert hook in the same chain-4 space, yarn over and pull up loop (you should have 3 loops on hook), yarn over, draw the yarn through 2 loops on the hook – now stop. You should have 2 loops on the hook.
Make another “incomplete” dc in the same space. you should have 3 loops on the hook.
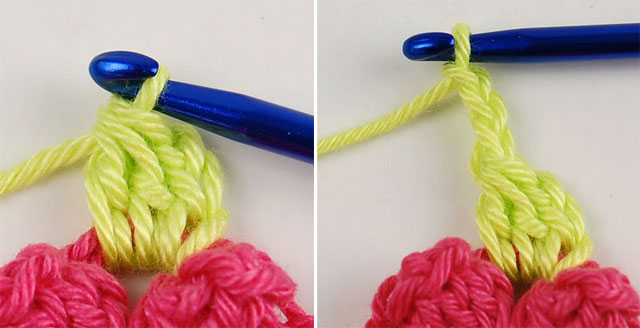
To complete Cluster stitch, yarn over and draw the yarn through all 3 loops on the hook.
Now, we’re going to make another Cluster (dc3tog) in the same ch-4 space, so make ch-3;
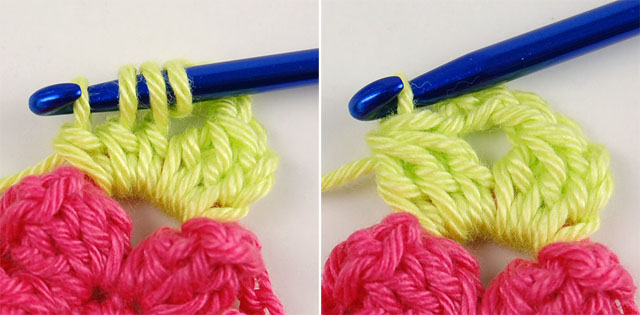
Make 3 “incomplete” dc in the same space (now, you should have 4 loops on your hook);
Grab the yarn with the hook and pull it through all 4 loops on the hook.
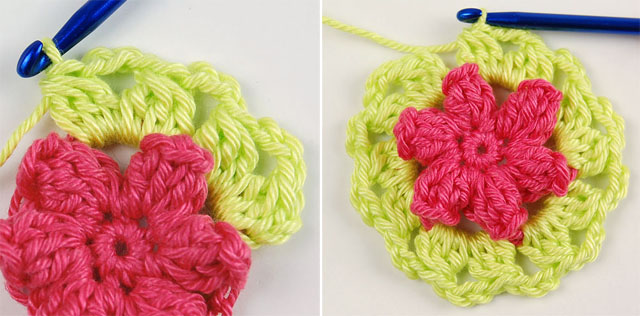
Make ch-3, then 2 Clusters in the next ch-4 space with ch-3 between them.
Continue making two Clusters into every ch-4 space, with ch-3 between each cluster.
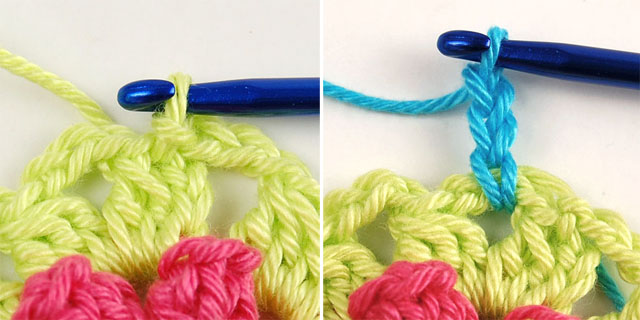
When you reach the beginning of the round join with slip st to the top of beginning Cluster. Fasten off.
Insert a new color in any ch-3 space, and make ch-3 (counts as dc);
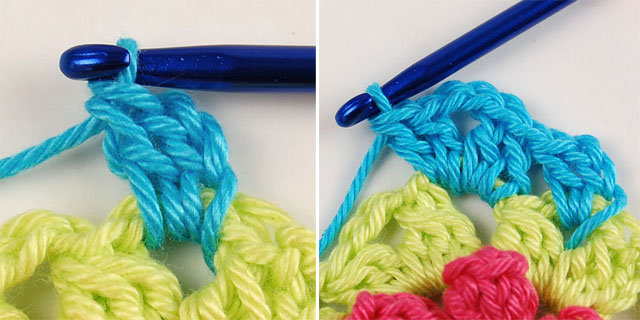
Make dc in the same space.
Make 2 dc in the next ch-3 space, ch-2, 2 dc in the same space;
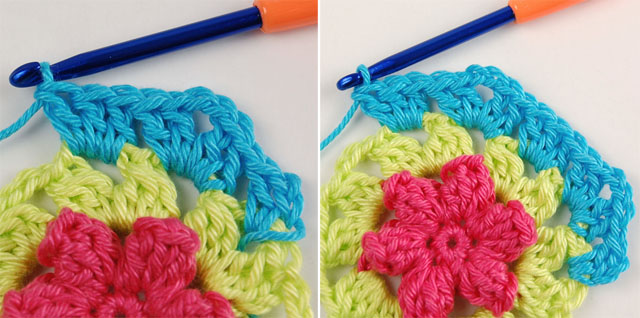
Make 3 dc in the next space;
* Make (2 dc, ch-2, 2 dc) in the next space, 3 dc in the next space;
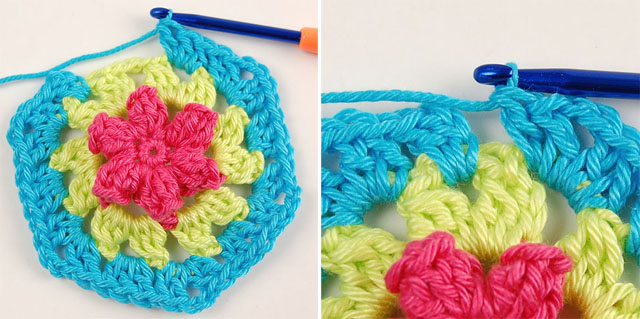
Repeat from * three more times;
Make (2 dc, ch-2, 2 dc) in the next space;
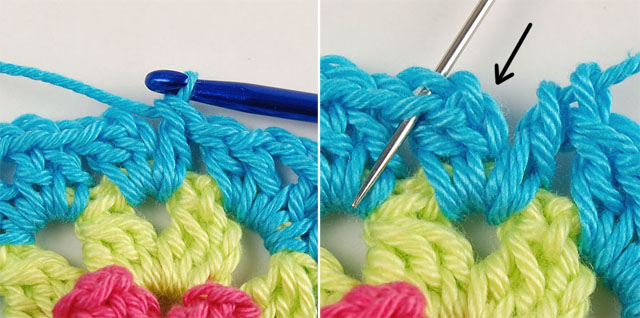
Make dc in the next space (where we’ve already made ch-3 and dc);
We will finish the hexagon with an invisible join. Cut the yarn and pull it through the stitch. Thread the tapestry needle, skip the beginning ch-3 (marked by arrow in the picture), and insert your needle below both loops of the next dc, from back to front, and pull it through.
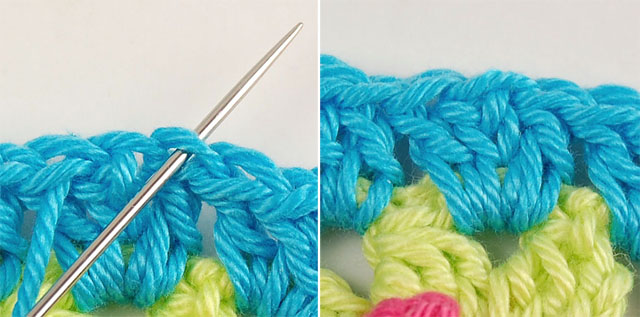
Insert the needle back, in the last dc you made – through the back loop only, from front to back, and pull it through. Weave in yarn end.
The join is invisible. Isn’t it?
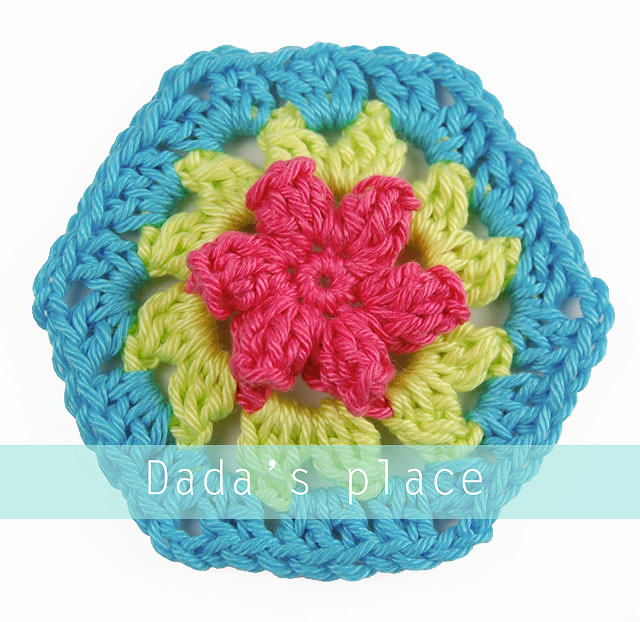
And now you have it! The flowery hexagon! You can use it for making blankets, cushions, scarfs, shawls, ponchos, bags, even rugs (which I consider making). The possibilities are endless. Let your imagination be creative…
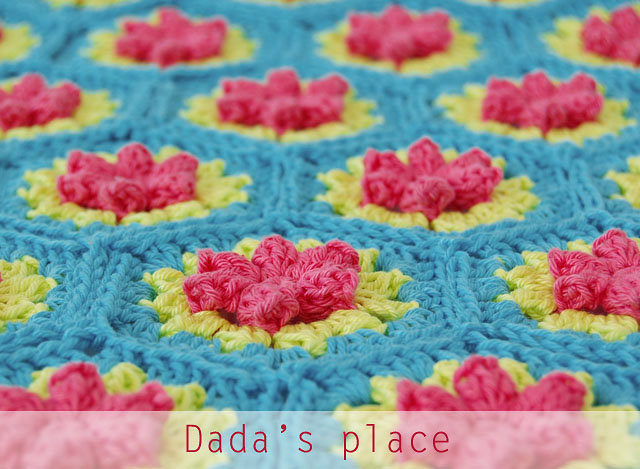
Hope you will like this tutorial! I really tried this tutorial to be easy to follow and understand, even for beginners, but if you encounter any mistake or problem with it, please let me know in the comments.
If you liked this tutorial, go and check out my other free tutorials:
Primavera Flower Granny Square
Vintage Style Crochet Blanket
Secret Garden Crochet Shawl
If you liked this tutorial, go and check out my other free tutorials:
Primavera Flower Granny Square
Vintage Style Crochet Blanket
Secret Garden Crochet Shawl
Thank you so much!
Thank you so much for this tutorial
So easy and so beautiful!
Thank you, for sharing, dear.
Lots of hugs from Portugal
Nina
So easy and so beautiful!
Thank you, for sharing, dear.
Lots of hugs from Portugal
Nina
Thank you for the free pattern, it's beautiful! I love your blog and the detailed instructions and photos. I've only been crocheting for a year and a half and have learned so much from you. I do have a question:
How did you join the hexagons together?
I'm so glad that you learned something from me! 🙂
I joined the hexagons using "join as you go" method.
Thanks Nina! I'm sending you hugs from rainy Serbia!
Love this, I'm new to crocheting and your step by step guide has made this easy for me to follow thank you
Clara – Derbyshire England xx
Beautiful, very nice colors , greetings
I'm so glad that it was easy for you! 🙂
x Dragana
THAAAAAAAAAAANKS!!!!!! love you!
have a nice day and happy crocheting!
THAAAAAAAAAAANKS!!!!!! love you!
have a nice day and happy crocheting!
Simply wonderful, my dear! And amazing color scheme as well! Thank so much for sharing your lovely pattern. Have a great day! xxx
hey Dragana,
Thanks for the free pattern.
How much yarn of each color did you use ?
have a great day !!
thank you just love this pattern colors just beautiful
I so wished to learn this hexagon pattern..and here you are ..!! You have posted such a beautiful free pattern post. 🙂 Thanks a million ..! I loved this pretty pattern ! <3 <3
You’re welcome! ❤️ ? ?
Thank you for the tutorial !
Thank you so much for his beautiful pattern. My question is the pictures only show the pointed ends. Did you do anything special for the other two sides?, ie half hexagons? I’m using multicolor centers, antique white for second round and coral for final round.
Thank you, Sue! Yes, I made half hexagons along shorter sides. You can see the whole blanket (the last picture) in this post: https://www.dadasplace.com/2016/05/my-first-hexagon-blanket.html
Lovely.thank you for the tutorial sounds easy will surely try it
I am very excited to make this. However, do you have joining instructions?
No, I’m sorry to disappoint you, but I don’t have joining tutorial.
Muchas gracias por compartir este patrón. Saludos desde mi Madre de Ciudades, Santiago del Estero, República Argentina
Thanks Margarita! Hugs from Serbia!
Gracias por el tumoral. Me encantó y los estoy haciendo.
Haré un cajin para mi nieta.
Desde la Patagonia Chilena un abrazo.
You’re very welcome! Hugs from Serbia!